I have started another project. I wanted a large Me109G6. I looked into the Meister, but did not want a flat bottom wing, and I was not real excited about the building techniques, nor the slab shaped vertical and horizontal tailplane. These would require extensive rework to give them an airfoiled shape. I thought of the Me109 offer by Pat McCurry, which has to be the cream of the crop. However, with so many airplanes, I could not justify the cost. Also, as many people know, I am just not a fan of foam. I am just no good with it. I also have a set of Dave Platt plans. I thought of using these, but the fuse is really designed around a smaller glow motor. To set it up as a gasser, would require some redo on the fuse. So, I started looking around for other plans.
I found that there are just not that many plan sets out there for the 109. Then I thought of American Eagle. Sure, it had a foam wing, but what if I got the glass fuse (to save time and money), and found a way to fit a new wing and tail to it. So, I ordered a fuse from Bob Sealy. I received the fuse. It come in 2 pieces requiring the tail section to be joined to the front section. The glass work is really nice. IF you have not seen Bob's glasswork, I'll tell you it is good. I had planned to enlarge Dave Plans for the tail plane and wing. While it worked out well for the tail plane, the wing would not fit correctly in the saddle. Dave has a reflexed airfoil in his wing. Therefore, the tailing edge of the wing curves up. The wing would not fit the saddle without reshaping the balsa fuse. So the Dave Platt wing was out. I ran across a set of Claude Baskin plans from IMP for a 65.5 inch Me109. So, I ordered a set. When I got them, I was surprised at how scale they were for such a small plane. I found that enlarging the wing plans 63 percent gave me a wingspan of 106 inches, and a wing that fit the wing saddle almost perfect.
So, I will be using an American Eagle glass fuse, enlarged Claude Baskin plans for the wing, enlarged Dave Platt plans for the stab and elevators, and the stock American Eagle plans for the rudder, with some reshaping to give the tail a more scale look. So, now I have my plans in order and it is off to the building table. |
|
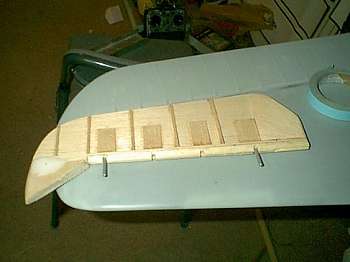
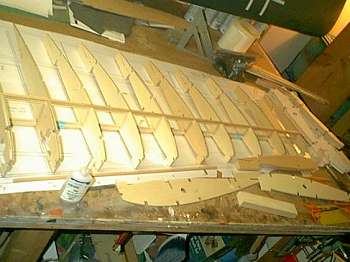
| Here is a pic of the stab layed up in my jig. Everything is placed on the center line. Pop it off the jig and it has to be straight. |
Pic of completed stab and framed up elevators. Stab is made from Dave Platt plans with 3/16 balsa ribs and a 1/4 sq. single spruce spar thru the center of the ribs. Light, but strong. Elevatos are 3/32 balsa core with 1/8 balsa false ribs.
|
 |
 |
One of the finished elevators, laying on my F7F tigercat stab. |
| One of the finished elevators, laying on my F7F tigercat stab. |
 |
 |
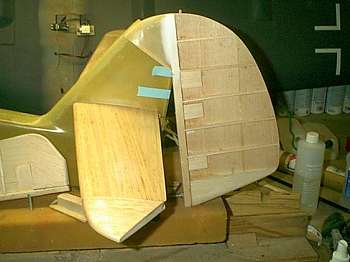
Here, the stab has been glassed and glued to the tail section of the fuse. Fuse comes in 2 pieces, so easy to handle during build. 3/16 balsa crutch pieces were glued on for added support to the bottom of the stab. Top side was reinforced with 6 oz. glass epoxied in place. Tail whel former also glued in. I use methacrylate from Wayne Seiwert (Aerotech Models). Nothin works better for gluing glass and wood. Glue will etch the resin, so no need to scuff sand prior to gluing. Elevator wire in place and will be controlled with a 5/32 dubro nose wheel tiller arm.
|
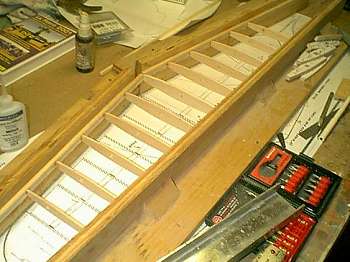
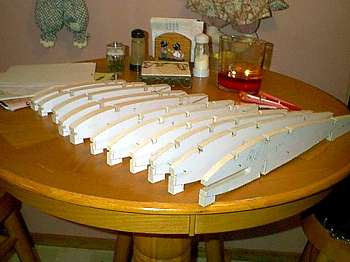
Just finished cutting out 44 ribs for 2 wings. Ribs 1-3 are 1/8 A/C ply, ribs 4-6 are 1/8 lite ply, while ribs 7-11 are of 3/16 balsa...great for grabbing the wood glue....and my poor waste can after cutting said ribs.
|
 |
 |
Left wing panel framed up with spars on...taking shape.
|
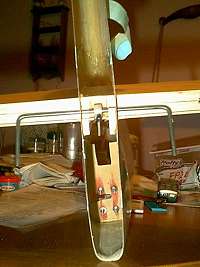
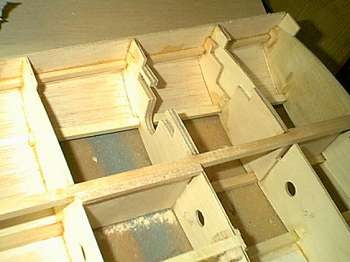
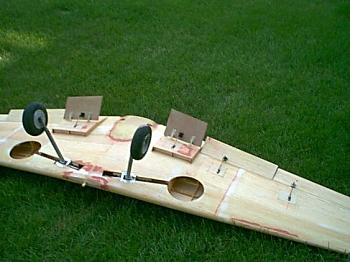
Close up of gear mounts for Shindin gear.
|
 |
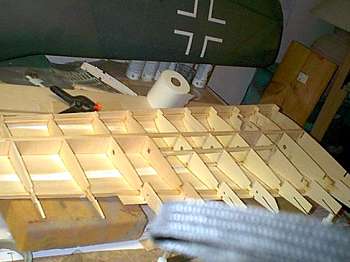 |
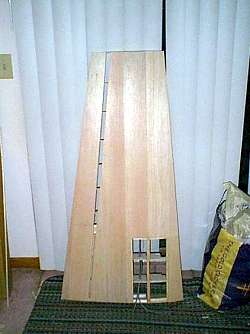
Here is one wing panel all sparred and sheeted top side, except for aileron/flaps. Ready to add bottom spars and bottom sheeting.
Note: must always keep toilet paper roll handy for wiping off glue from fingers.
|
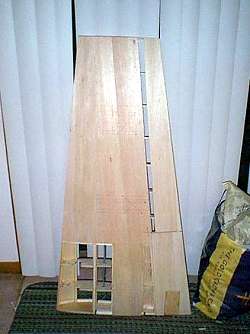
Here, the other wing panel is all sheeted...well, as far as I can go before joining wing panels. This is the top view. Sheeting is left off for getting clamps in to hold wing together while glue is drying. Gap in wing is to cut flaps and aileron loose and then they will be capped with 1/2 inch balsa. This methos also allows me to work on gear mouting before closing off. |
|
|
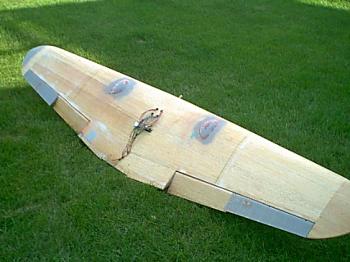
Bottom view of completed panel. Read marking is for servo hatch cutout. Also, I inserted 1/64 ply between the sheeting of the trailing edge to protect agains hangar rash...hate getting those V's from dinging the wing into door and car corners |
|
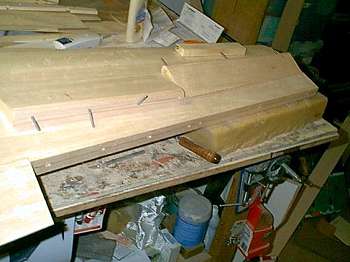
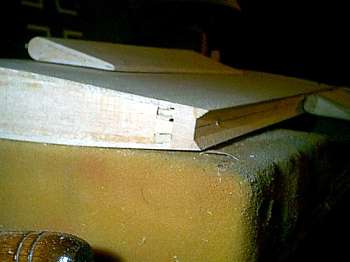
Both wing panels are now sheeted and the aileron and outer flaps have been cut off. The trailing edge of the wing and the leading edge of the flap and aileron have been capped with 1/2 inch balsa. Leading edge of flight control radiused for scale hinge line.
|
 |
Here, the trailing edge, full length, are capped top and bottom with 1/4 triangle balsa stock. This will create a gap seal. An a pic of the flight controls installed to see the effect of the gap seal.
|
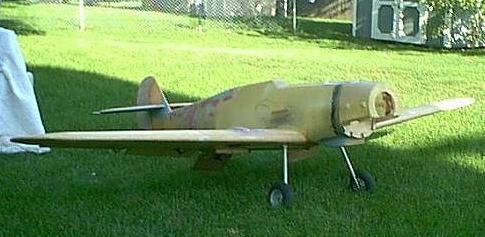
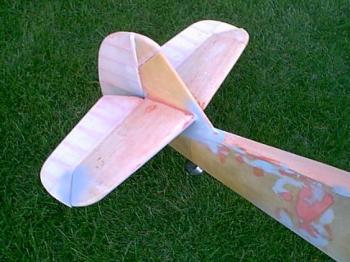
It is now ready to test fly without paint. with all these mix-matched pieces, I figure 'see if it flies before I paint'. Here is a picture of the Me109 back and spine. |
 |
 |
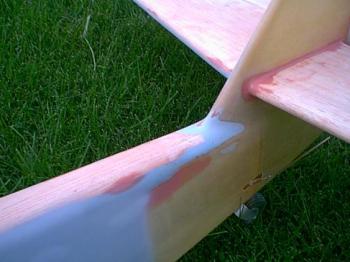
The American Eagle fuse came with a flat, squared off spine. This didn;t look good. So, I added 3/16 balsa and shaped it to get the required radius. You can see the balsa and Bondo added to get the required shape |
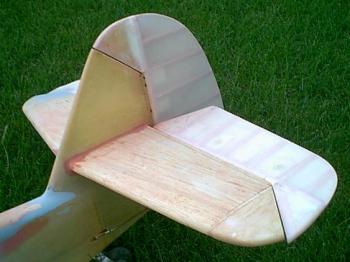
Here is a picture of the tail feathers on and doped with pinking tape. |
 |
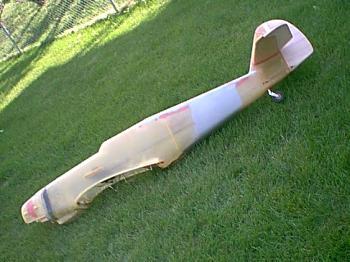 |
Here is the fuse ready for primer. With the engine in and fuse full of goodies, it weighs 14 pounds (fuse only). |
Also, this is the top and bottom view of the inng. You can see the wheel bulges, radiator door flaps, Shindin gear and Glennis wheels. |
 |
 |
The wing, ready to paint weighs almost 13 pounds (wheels and gear account for almost 5 pounds of this). The plane should be around 32 pounds painted, balanced and ready to fly.
|
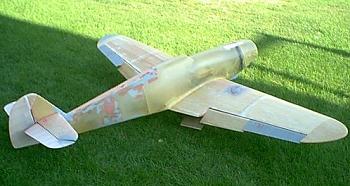
Here is a 3/4 front and rear view, ready for engine and balance. Test flight slated in a week or 2 prior to paint. |
 |
|
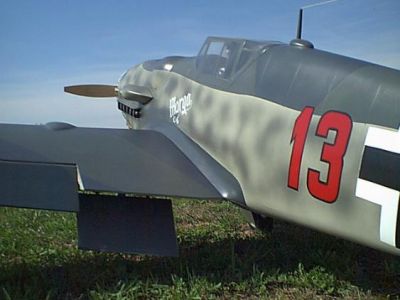
I have since added the fuse gun breach covers from Pat Mccurry, as well as the turbo inlet.
|
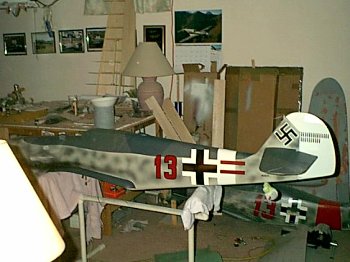
This picture shows the fuse all painted, with vinyl decals applied.
|
 |
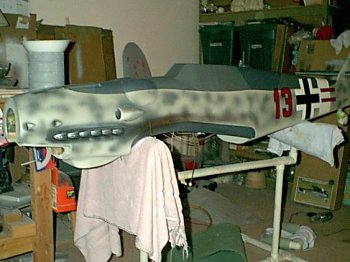 |
The plane was painted with Model Master Military spray cans, clear coated with Krylon satin. The decals were made up by a local sign shop. |
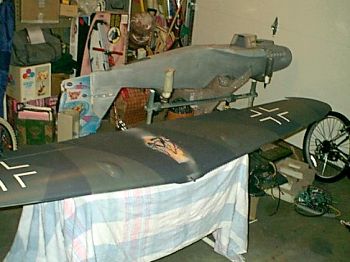
This is the wing, all painted up. The wing cross was hand painted.
|
 |
|
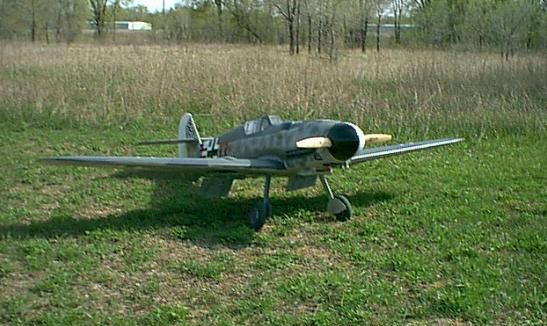
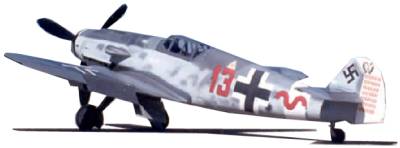
Here are some shots at the field. The plane was finished off at 32 pounds, with 1.75 pounds of lead in the nose to balance. It has Shindin gear and Glennis wheels, with tail fork from Sierra. The engine is a 62CC chain saw conversion that is now 11 years old. I am running a 22x10 Zinger, but after I become more familiar with the plane, I will switch to a Zinger 20x8-14 prop. There are 6 Hitec 605 servos in the wing running the flaps and ailerons. There are 2 605's coupled with a B&B servo doubler running the elevator. A Hitec 705 runs the rudder and tailwheel steering. Airtronics 94102 standard for throttle. There is a 1/2 cockpit with pilot bust. To date, I have 6 flights on the plane. 5 were made in primer to test the airframe concept. Then, I put one flight on it in full dress when the retract vavle servo failed...luckily on the ground. The airplane tracks well on the ground with rudder. With gear up, the plane flies like on a rail. With gear down, the plane becomes a bit bouncy with the drag from the gear. Lands very nice and slow with full flaps at 55 degrees. It appears my cheap "kit" is a success. With any luck, I plan to build a 125 inch twin "Zwilling" 109Z down the road...in a year or two with the same set-up. |
BACK to PROJECTS
|
|
Become an RCWarbrids site supporter by making a donation.
|
$5.00 |
 |
$10.00 |
|
$15.00 |
|
$20.00 |
|
| |
|
|
|
|